If you’re starting your gardening journey, composting is one of the best habits to adopt early on. It transforms kitchen and yard waste into nutrient-rich soil, reduces your household waste, and makes your plants happier and healthier. Best of all? You don’t need a big yard or fancy tools to get started.
This guide will walk you through everything you need to know about composting at home—from what to compost to how to avoid common mistakes.
Why Compost?
Composting is often referred to as “black gold” for gardeners. Here’s why it’s worth your time:
-
Improves Soil Health: Compost enriches your soil, improving its texture, water retention, and nutrient content.
-
Reduces Waste: Up to 30% of household waste is compostable, meaning less trash in landfills.
-
Saves Money: You won’t need to buy as much fertilizer or soil conditioner.
-
Eco-Friendly: It lowers methane emissions from landfills and reduces your carbon footprint.
Even a small effort at home can make a big environmental impact—and your plants will love it!
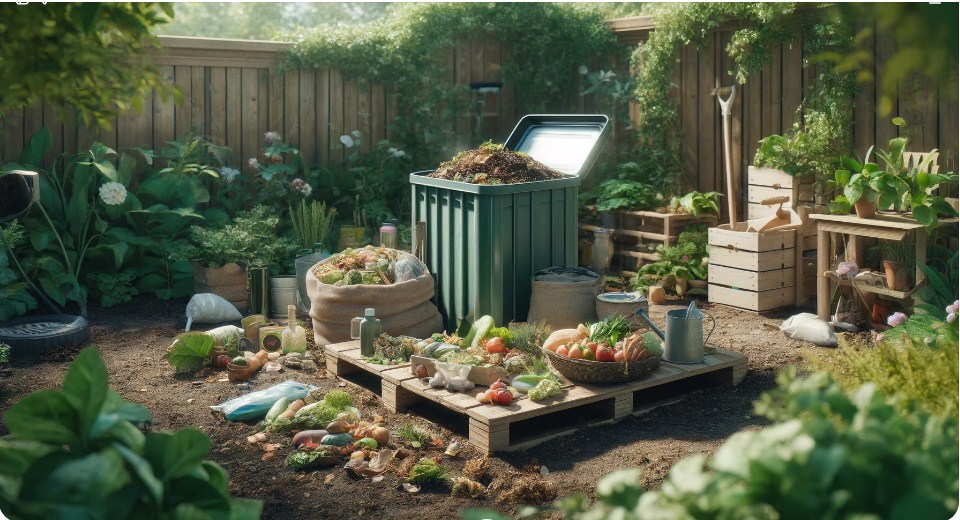
What Can You Compost?
Not everything biodegradable belongs in your compost pile. Here’s what’s safe—and what to avoid.
Compostable Materials (The Good Stuff)
Greens (Nitrogen-rich materials):
-
Fruit and vegetable scraps
-
Coffee grounds and filters
-
Tea bags (check for plastic)
-
Fresh grass clippings
-
Plant trimmings
Browns (Carbon-rich materials):
-
Dry leaves
-
Paper (non-glossy, shredded)
-
Cardboard (shredded)
-
Sawdust (from untreated wood)
-
Straw or hay
-
Egg cartons
Avoid These Items (They Cause Problems)
-
Meat, fish, or bones (attract pests)
-
Dairy products
-
Fats or oils
-
Diseased plants
-
Pet waste (can carry pathogens)
-
Glossy/coated paper
Stick to natural, plant-based waste for the best results.
Choosing a Composting Method
Depending on your space, climate, and lifestyle, there are a few different ways to compost.
1. Backyard Compost Pile or Bin
Best for people with outdoor space.
-
Requires a bin or open pile
-
Turn it with a pitchfork or compost aerator every few weeks
-
Finished compost in 2–6 months
2. Tumbler Compost Bin
Great for urban gardeners.
-
Enclosed and pest-proof
-
Easy to turn
-
Speeds up the composting process
3. Indoor Composting (Bokashi or Worm Bin)
Ideal for apartments.
-
Bokashi uses microbes to ferment waste
-
Vermicomposting uses worms to break down scraps
-
Low odor, compact, and efficient
No matter which method you choose, the key is balancing greens and browns.
How to Start Composting: Step-by-Step
Step 1: Choose Your Spot
Pick a location that’s accessible, shady, and has good drainage. If you’re composting indoors, select a spot with ventilation.
Step 2: Add Browns First
Start your compost pile with a layer of browns like dry leaves or shredded newspaper. This helps with aeration and absorbs moisture.
Step 3: Add Greens
Layer on your food scraps, coffee grounds, and other greens.
Step 4: Alternate Layers
Aim for a 2:1 ratio of browns to greens. Too many greens lead to smelly, wet compost; too many browns slow the process down.
Step 5: Keep It Moist (But Not Wet)
Your compost should feel like a wrung-out sponge. If it’s too dry, add water. If it’s too wet, add more browns.
Step 6: Turn Regularly
Mixing the compost every week or two introduces oxygen and speeds up decomposition. Use a shovel or compost aerator.
How to Know When Your Compost Is Ready
Depending on your method and materials, compost can take anywhere from 2 months to 6 months to mature. Here are signs it’s ready:
-
It’s dark brown and crumbly
-
It smells earthy, not like food or garbage
-
You can’t recognize the original ingredients
Once ready, you can mix it into your garden beds, use it in potted plants, or spread it on your lawn.
Troubleshooting Common Composting Issues
Even the most well-meaning composters run into hiccups. Here’s how to fix them:
It Smells Bad
Problem: Too many greens or poor aeration
Fix: Add more browns and turn the pile more often
It’s Too Wet
Problem: Excess moisture from food scraps or rain
Fix: Mix in dry leaves, cardboard, or straw
It’s Not Decomposing
Problem: Not enough nitrogen or oxygen
Fix: Add greens and turn more frequently
Pests or Flies
Problem: Meat, dairy, or uncovered scraps
Fix: Bury food scraps under browns and avoid meat and dairy
Pro Tips for Better Compost
-
Chop scraps into smaller pieces to speed up decomposition.
-
Store scraps in the freezer until you’re ready to compost (reduces odors).
-
Cover each green layer with browns to keep pests and smells away.
-
Use a compost thermometer to monitor activity (optional, but helpful).
-
Don’t overthink it—nature knows what to do.
How to Use Finished Compost
When your compost is ready, here’s how to use it:
-
Garden beds: Mix 2–3 inches into topsoil
-
Potted plants: Blend compost with potting mix (about 25%)
-
Lawn: Spread a thin layer over the grass in spring or fall
-
Mulch: Place around the base of plants to retain moisture
Your plants will thank you with healthier growth, richer blooms, and bigger harvests.
Final Thoughts: Small Habit, Big Impact
Composting is one of the simplest ways to create a more sustainable lifestyle—and it makes your garden thrive. Whether you live in an apartment or on a farm, there’s a composting method that will work for you.
As a beginner, you don’t need to be perfect. Just start small, learn as you go, and enjoy the satisfaction of turning your trash into treasure. One banana peel at a time, you’re building a greener world—literally.